SORA User Guide 1: Sign in
There are two ways to register for Sora. You can choose one of the following options:

Option 1: Visit the independent Sora website, sign up, and then upgrade to a Plus user.
Option 2: First, register for the ChatGPT Plus plan on the official OpenAI website, and then log into Sora with your OpenAI account. Sora will automatically activate your Plus access.
SORA User Guide 2: Log in
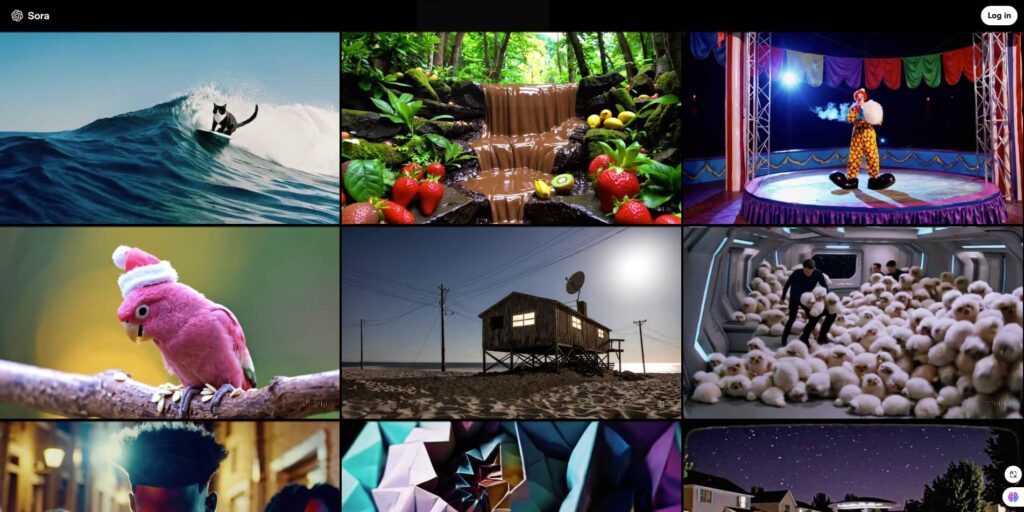
To register, go to https://sora.com
SORA User Guide 3: Price
After logging into Sora, if you are not yet a Sora user, it will prompt you to upgrade.
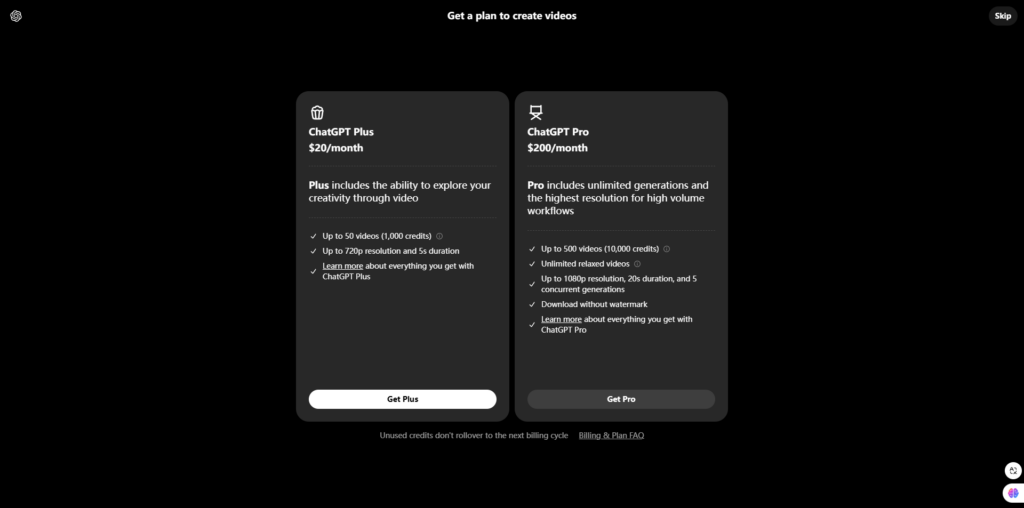
In short, the $20 plan ($20/month) has a usage limit, while Pro users ($200/month) have unlimited access.
The longer the video and the higher the resolution, the more credits it consumes.
SORA User Guide 4: Interface
Overall Interface.
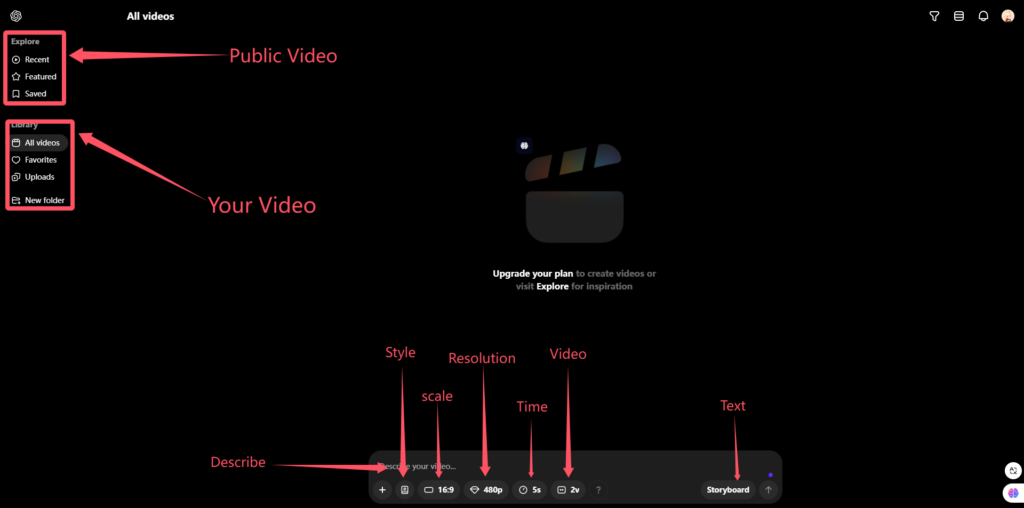
On the left is the library, where you can view both the public library and your personal library.
SORA User Guide 5: Community for creations
At the top, the Explorer section is a community for creations. Experts and the platform share their video examples here, which beginners can use as references to create better videos.
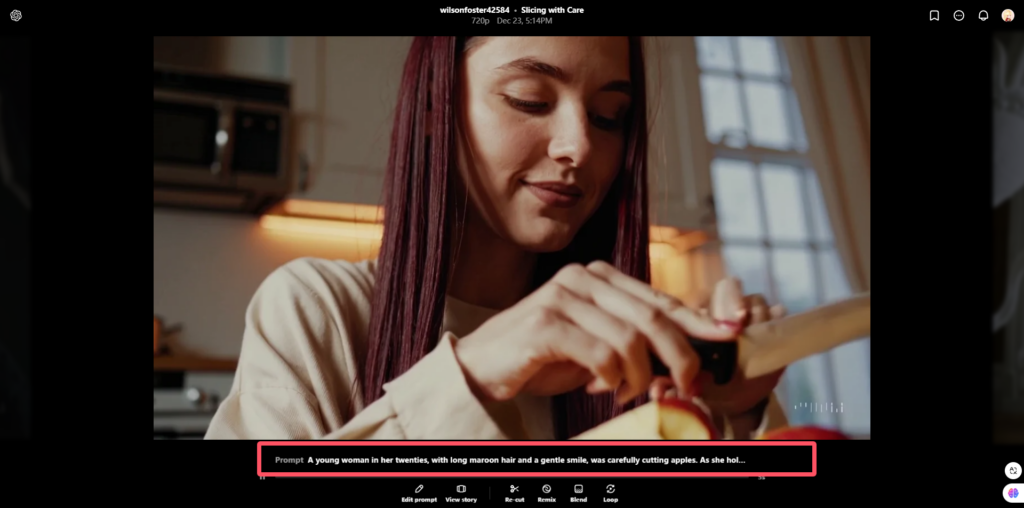
If you find something you like, you can click on it to see the prompts and specific techniques used. You can also save it for learning and incorporate it into your own creations.
SORA User Guide 6: Control Panel
Directly below the homepage is the control panel.
Here, you can select the style, aspect ratio, resolution (ranging from 480 to 1080), video duration (5 seconds to 20 seconds), and the number of videos to generate (1 to 4).

Note that the multiple videos under the same prompt are not simple repetitions but videos from different angles. You can use montage techniques to combine them into a longer video.
For example, if you input: “A wide, serene shot of a family of woolly mammoths in an open desert”
You will quickly receive the following four videos.
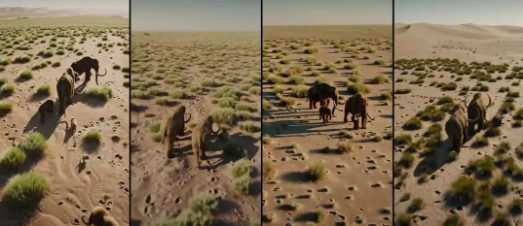
By clicking on any video, you can save it to your collection, download it, or edit it further.
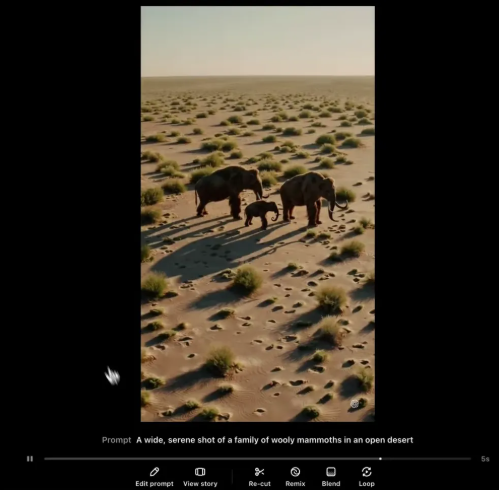
You can perform the following edits:
- Edit prompt: Modify the prompt to generate a new video.
- View story: Enter the storyboard for this video (if available).
- Re-cut: Trim the video and make any desired cuts.
- Remix: Modify the video by overlaying changes through natural language prompts.
- Blend: Combine multiple videos into one.
- Loop: Create a looping video.
SORA User Guide 7: Video Style
You can specify the style through prompts, and the system also has some built-in styles to choose from.

Here are some of the built-in video styles available:
- Pastel Symmetry

- Balloon World

- Stop Motion
- Archival
- Film Noir

- Cardboard & Papercraft
SORA User Guide 8: Video Style
Sora has a very interesting feature called the Storyboard.
It serves as a control tool for creating long videos. You can use it to combine multiple videos into one cohesive, story-driven video.
As the demo presenters put it, the storyboard allows you to set multiple action sequences for the video along a familiar timeline, giving you full control like a director.
To access the storyboard, click on the Storyboard button on the right side of the Control Panel on the homepage.

Then, you’ll enter the following interface.
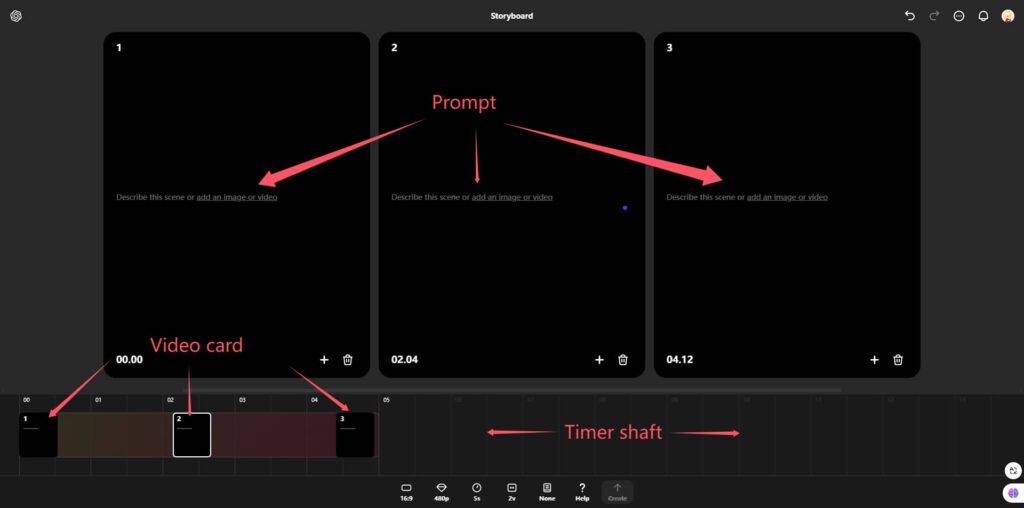
Below is the timeline, and above it are the video cards.
You can set multiple video cards on this timeline, and Sora will generate several videos with the same subject and a coherent storyline based on these cards. However, make sure to leave appropriate time between two keyframes to allow Sora to automatically create physically consistent video scenes.
This feature can be used to generate longer videos.
Additionally, apart from text-based generation, you can also import images to generate videos, which is done using starting and ending frame images.

SORA User Guide 9: Re-cut
Sora’s editing feature not only allows you to trim videos but also lets you regenerate a video on the edited footage.
For example, if you input the prompt “a robot on a remote hillside”, Sora will generate five seconds of video from different angles of the robot.
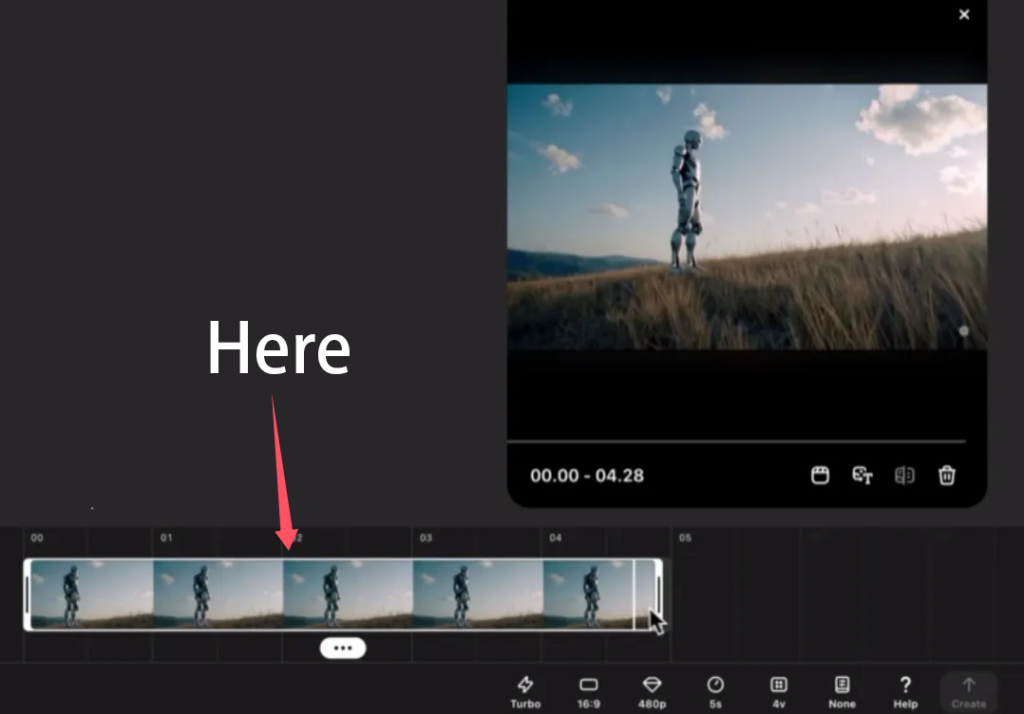
If we don’t want the side view and just want to extend the distant shot, we can use Re-cut.
After trimming the video to only 2 seconds, click “Create,” and Sora will automatically fill in the remaining 3 seconds to complete the video.
SORA User Guide 10: Rimix
This feature allows you to modify a specific object within a video.
For an already generated video, you can use a prompt to modify or replace the original subject.
Simply describe the changes you want to make in natural language, and Sora will automatically carry out the replacement.
Sora will automatically make the change, replacing the mammoth with the robot in the video.
For example, if you want to replace a woolly mammoth with a robot, you can simply input a prompt like:
“Replace the woolly mammoth with a robot.”

Input the prompt: “Replace the woolly mammoths with robots”, then adjust the blend strength to control how seamlessly the new element (the robots) integrates into the existing video.
A higher blend strength will make the change more noticeable and distinct, while a lower strength will result in a more subtle transformation.

After using Remix.

SORA User Guide 11: Blend
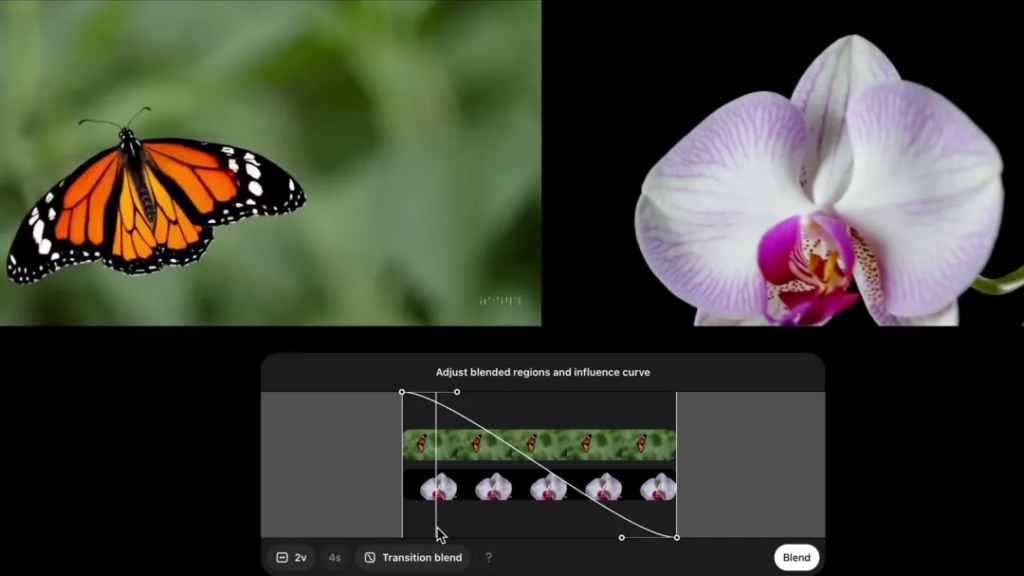
This feature allows you to merge two different videos together.
For example, if you want to combine videos of a butterfly and an orchid, you can drag the two videos together and click Blend. Sora will then merge the two videos, creating a seamless transition between the butterfly and the orchid, or combining elements from both to create a cohesive video.
SORA User Guide 12: loop
Let’s look at the last feature: Loop.
If you like a particular segment of a video, you can use Sora to generate a looping video that will play continuously. This feature allows you to take a short segment and seamlessly repeat it, creating an infinite loop of that video.
To create a looping video, you can:
- Trim the video to include the first and last frames that are similar to each other.
- Select the transition time for the loop, determining how smoothly the video will repeat.
- Click Loop, and Sora will generate a seamless looping video that transitions smoothly from the end back to the beginning.
More Tutorial
If you’re excited to dive into the world of AI image generation, you’ve come to the right place! Want to create stunning images with Midjourney? Just click on our Midjourney tutorial and start learning! Interested in exploring ComfyUI? We’ve got a detailed guide for that too. Or maybe you’re curious about WebUI? Our WebUI tutorial has you covered. Each guide is designed to be simple and fun, helping you master these powerful tools at your own pace. Here, you can learn all the AI knowledge you need, stay updated with the latest AI trends, and let your creativity run wild. Ready to start? Let’s explore the exciting world of AI together!
Share this content:





Post Comment