This Episode Summary:
- System Requirements for ComfyUI
- How to Check Your GPU and Choose the Right One
- Installing ComfyUI on Your Local Computer
- Using Models from Other Stable Diffusion Folders in ComfyUI
Caution: Since my computer has a desktop configuration supported with NVIDIA GPU, I will base my installation of SD Comfy UI on desktop systems with NVIDIA graphics cards. For systems such as mac OS, I’ll provide the link to the official guide and request you to go through it for the installation.
ComfyUI Local deployment Installation process:
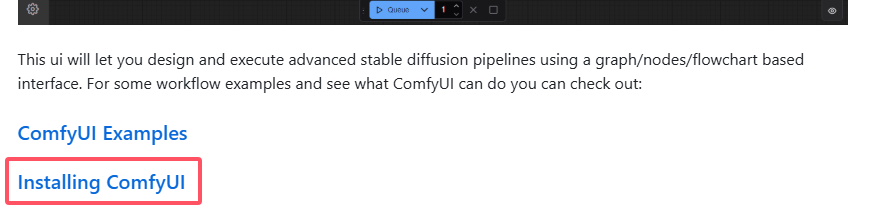
Comfy UI’s developers have made the user-friendliness of their UI simple by providing a one-click installer. The release page contains a separate Windows installer which can be downloaded directly and used without going through the hassle of decompression.
I will not, at least, be sharing pre-integrated installation packages from advanced users, but I will show you how to configure and build your SD Comfy UI software step by step. This way, you will know how to make the necessary installation modifications for your optimal performance.
This way, when you use Comfy UI in the future, you will have a much better understanding of how to work with it, and comprehend its finer details from usage. By learning the installation process step by step, you will be able to understand the overall software better and make it work for your specific needs.
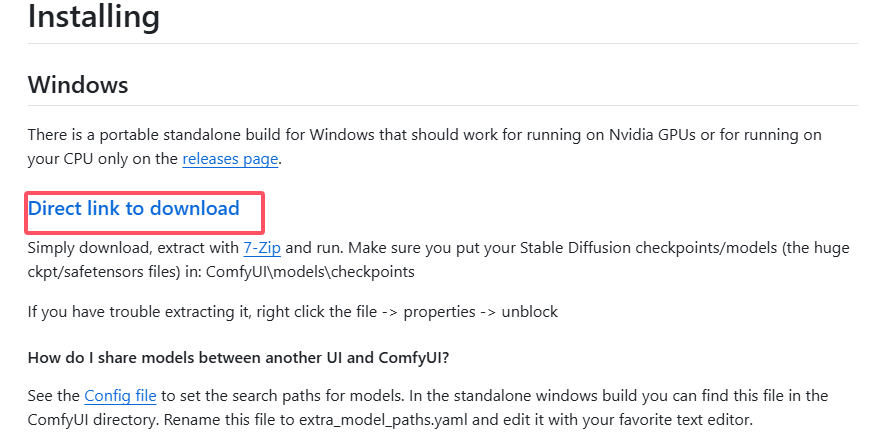
To download the ComfyUI Installation zip file which has a size of 1.45GB, click on “Direct link to download”. The package is quite small as it does not come with any models, and you will need to install them separately.
After the download is complete, you will have a ComfyUI installation zip file on your device. You are free to extract the contents of the zip file to a folder on your computer, that you can later use for the installation files.

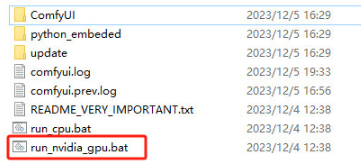
Ideally, extract the zip file to the root directory or specific folder you create to prevent clutter. Additionally, extract the folder to a hard drive that has sufficient empty space. Afterwards, you should be able to see the folder structure similar to the image shown below.
Congratulations on completing the ComfyUI local installation. You can start utilizing ComfyUI. Enjoy using the features and workflows that give you the freedom to customize them to your needs.
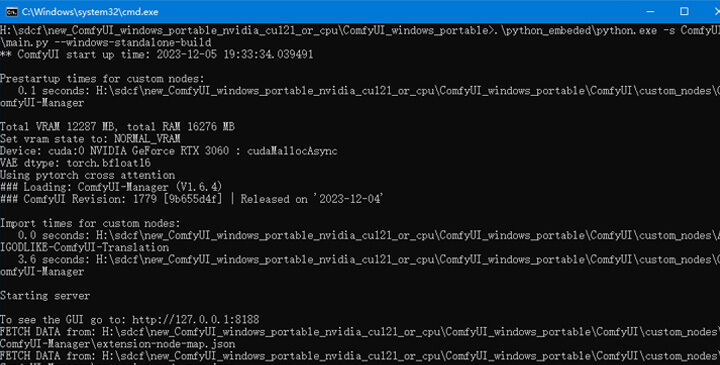
ComfyUI can be started by simply double clicking on the “run_nvidia_gpu.bat” file. This leads you to the Comfy UI interface so you can start using the software right away.
The system booting is done pretty quickly. After some time, you should see your browser open with the ComfyUI ready to be used already. If it does not open right away, you can go to http://localhost:5000 on your browser to view the ComfyUI interface.
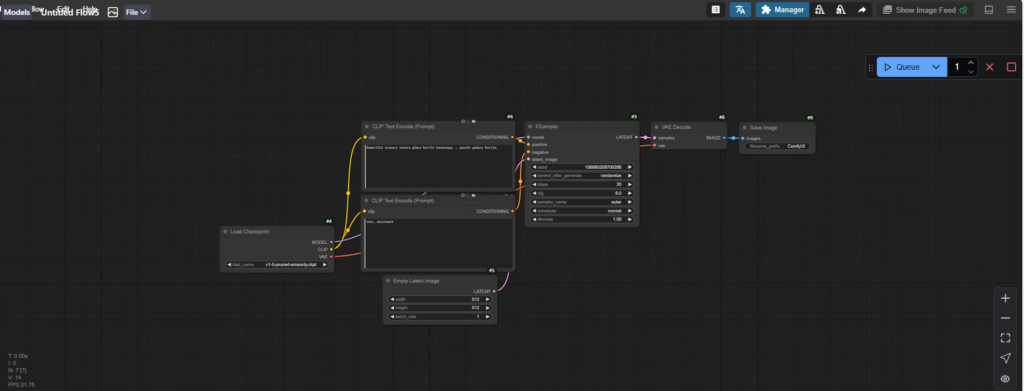
Congratulations! You have successfully launched ComfyUI. You can now learn more about how to set up workflows and work with different models to create images. Enjoy working with your new setup!
Important: Always remember to not shut the command prompt or batch while ComfyUI is opened and in use. The command window is required for Comfy UI to keep functioning. Closing it will result in the program failing to run. So always ensure the window is open.
Installing Models in ComfyUI Made Simple:
Installing Models in ComfyUI Made Simple
Step 1: Get Your Models
First, grab your desired model from platforms like Hugging Face or Civitai. These repositories offer various Stable Diffusion models in formats like .ckpt or .safetensors.

Step 2: File Organization
Now that you’ve got your model file:
- Navigate to your ComfyUI directory
- Drop it in the
modelsfolder - For major models (like checkpoint files), use the dedicated
ComfyUI/models/checkpointssubfolder
Pro Tip for WebUI Users
If you already use WebUI and dread duplicate files:
- Locate your WebUI models at
stable-diffusion-webui/models/Stable-diffusion - Create symbolic links to
ComfyUI/models/checkpoints - Both platforms can now share models without double storage!
Configuration Magic
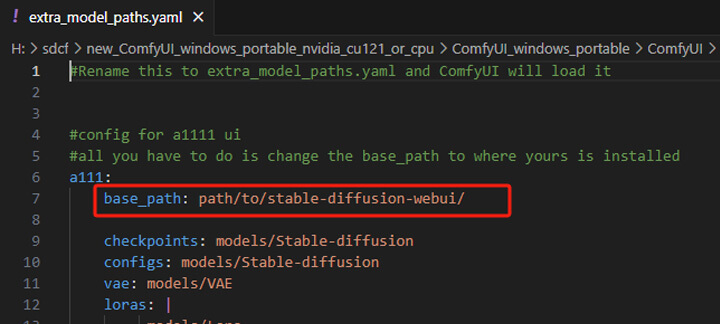
- Find
extra_model_paths.yaml.examplein your ComfyUI folder - Remove “.example” from the filename
- Edit the new .yaml file with any text editor
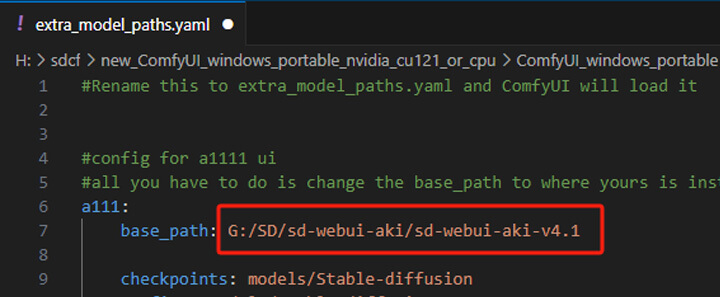
- Point it to your WebUI directory using forward slashes (/)
✅ Good:G:/SD/your_path_here
❌ Bad:G:\SD\your_path_here


Final Touches
After saving changes:
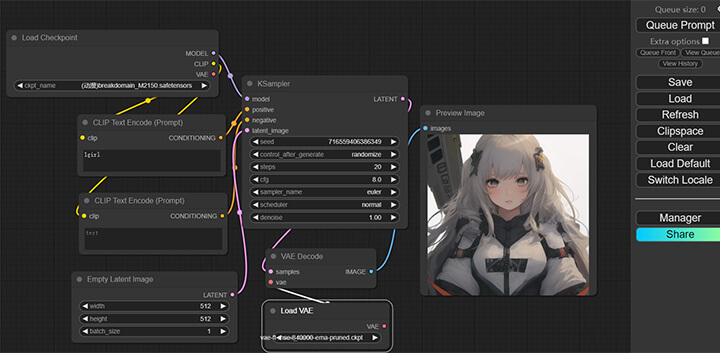
- Restart ComfyUI – your WebUI models will appear!
- Verify model selection in your workflow settings
Keeping Current
In the ComfyUI/update folder:
- Run
update_comfyuifor core updates - Use
update_comfyui_and_python_dependenciesfor full upgrades
When you see “Done”, you’re rocking the latest version!
More
If you want to dive into the breathtaking world of AI image generation? You’ve landed in the perfect spot! Whether you’re looking to create stunning visuals with Midjourney, explore the versatile power of ComfyUI, or unlock the magic of WebUI, we’ve got you covered with comprehensive tutorials that will unlock your creative potential.
Feeling inspired yet? Ready to push the boundaries of your imagination? It’s time to embrace the future, experiment, and let your creativity soar. The world of AI awaits—let’s explore it together!
Share this content:


Post Comment