- How to Use Midjourney 01: A Comprehensive Guide for Beginners
- How to Use Midjourney 02-How to add robots
- How to Use Midjourney 04-Enhanced Combining Commands Part1
- How to use Midjourney 03-Breakdown of Common Commands
- How to Use Midjourney 05-Enhanced Combining Commands Part2
When it comes to AIGC (Artificial Intelligence Generated Content) in digital painting, Midjourney is an essential topic. Its ease of use, high efficiency, strong creativity, and excellent image quality have made it widely adopted in the designer community.
This course will break down Midjourney’s parameters and commands. The outline is as follows:
- Chaos (
--c) - Negative (
--no) - Stop (
--stop) - Repeat (
--repeat) - Multiple Prompts (
::)
For more information, please click here to enter the Midjourney feature.
How to use Midjourney 01 — Chaos (--c)
Effect of Values

Range and Default
Range: 0 to 100.
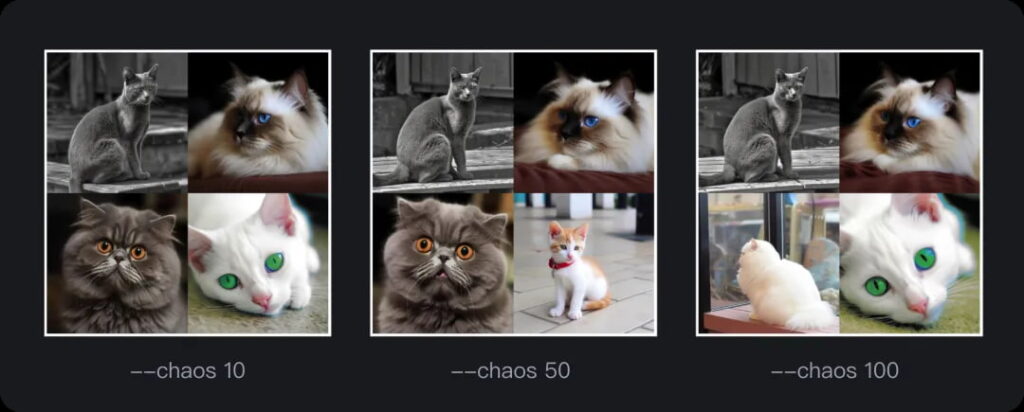
Low Chaos (e.g., --chaos 5):
- Generated images are more similar to each other.
- Effective for creating slight variations of a subject, like consistent characters or scenes.
High Chaos (e.g., --chaos 50):
- Greater diversity among generated images.
- Useful for exploring unexpected compositions or creative twists.
As shown in the figure below: the higher the chaos value, the greater the difference combination between a group of pictures will be generated, and new pictures may appear; the lower it is, the closer it is to the original image, which can be used to generate similar people, and the value can be written within 5.
How to use Midjourney 02 — Negative (--no)
The --no parameter is used to exclude specific elements from the generated image.
Usage Example
- Prompt: a cozy bedroom –no plants
- Result: A bedroom image without any plants.
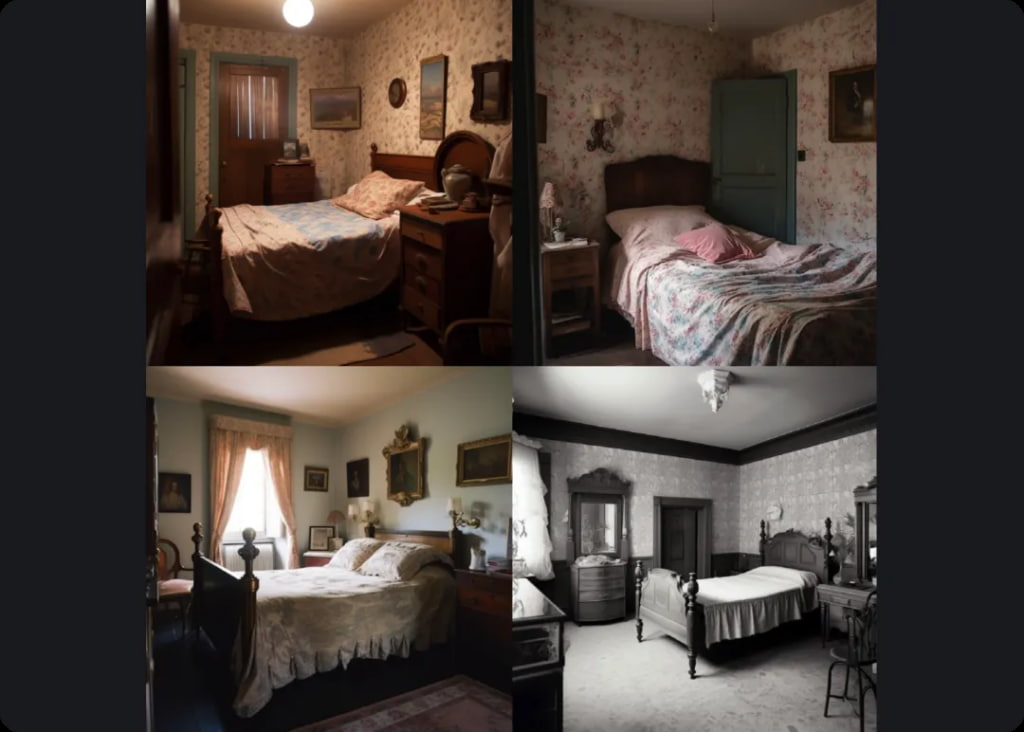
When I don’t want a bed in the room, I add –no bed.
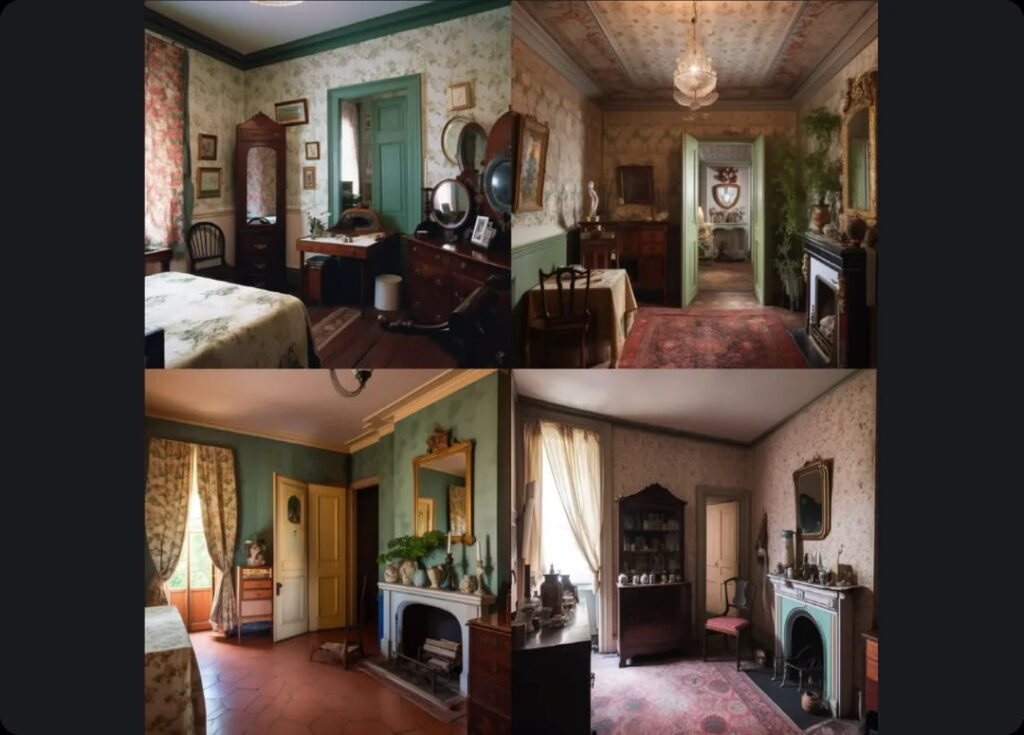
Usage Scenarios
Remove undesired objects, like clouds, animals, people, or specific colors.
Control unwanted artistic interpretations, e.g., no blur, no background, or no watermarks.
Recommendation
Use --no for fine-tuning images when specific details detract from the desired result.
Combine with other parameters like --chaos or --stylize for better control over creative outputs.
How to use Midjourney 03 — Stop (--stop)
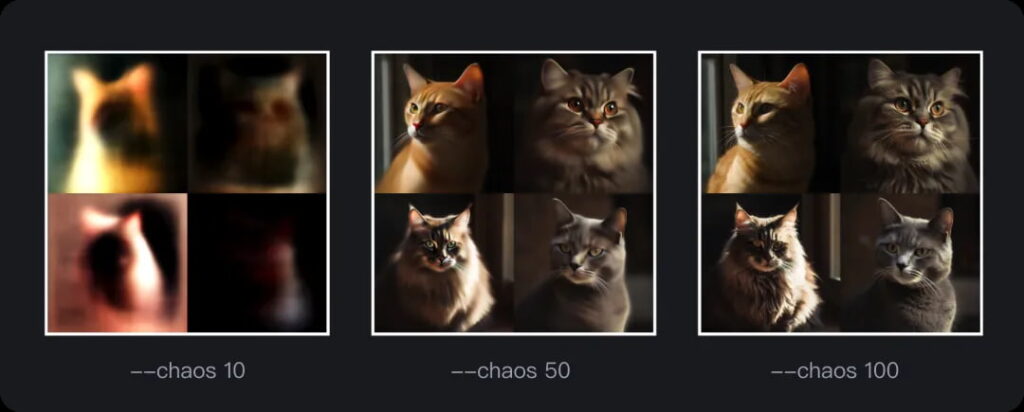
The --stop parameter allows you to control when to stop the image generation process. It accepts values from 10 to 100, with the default being 100.
How It Works
The --stop value determines at what progress the generation stops.
A lower value (e.g., 10%) results in less detailed and blurry images.
A higher value (e.g., 100%) results in a fully detailed and finished image.
Usage Example
Practical Tips
Low stop values (e.g., 10-30) are useful for abstract or unfinished looks.
High stop values (e.g., 80-100) produce detailed, complete images.
How to use Midjourney 04 –Repeat (--repeat)
The --repeat command allows you to generate multiple images at once, similar to the “gacha” or “pulling multiple cards” mechanic in games. This is useful when you want to quickly generate multiple variations of a prompt, accelerating your image creation process.
How It Works
Usage: --r or --repeat followed by the number of images you want to generate.
The command allows you to generate multiple outputs in one go, saving time and effort when you need variations.
Subscription Limitations
For the Standard Plan ($30/month): You can generate 2 to 10 images at a time.
For the Pro Plan ($60/month): You can generate 2 to 40 images in one request.
Example Usage

Prompt: a majestic dragon flying over a mountain –repeat 5
- Result: The system will generate 5 different images based on the same prompt.
Benefits
Useful for quickly obtaining multiple variations of a design or concept.
Helps to speed up the image generation process, especially when experimenting with ideas or designs.
How to use Midjourney 05 — Multiple (::)
The :: separator allows you to handle multiple keywords or prompts independently. You can also adjust the weight for each keyword, which determines how strongly each prompt influences the final image.
How It Works
Usage: Use :: between two or more keywords. You can also set weight values to specify how strongly each keyword should affect the generated image.
The weight is represented by a decimal number, where the default is 1, and you can set values like 0.5, 1.5, etc. If the weight is 0.5, it can also be written as .5.
Application
This feature is useful when you want to combine multiple ideas but control the influence of each idea on the final image.
You can also use this method to fine-tune the focus of each concept, making one more prominent than the other.
Example 1

Here’s the abbreviation. hot:: dog = hot::1 dog::1 equals 1:1. You can also use the “, “sign to distinguish, such as hot,dog, will also separate association, but there are still some differences.
Example 2
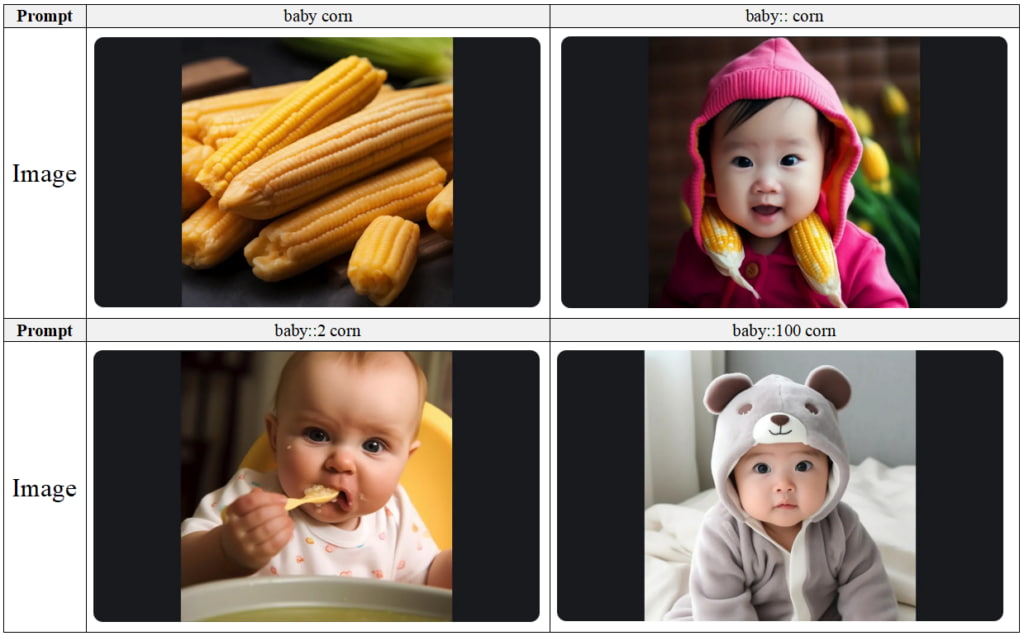
That is, the weight of the baby and the corn is 100:1, and the resulting picture has almost no picture of the corn.
Note that the sum of :: weights must be positive, preferably greater than 0.5, equal to 0, the generated image will appear unrelated to the keyword
Example:baby:: corn = baby::1 corn::1, 1+1=2
It follows that:
baby:: corn::-2 ❌
baby:: corn::-.5 ✅
baby::2 corn::-2 ❌
baby3:: corn::-2 ❌
baby::1.5 corn::-2 ❌
baby::51 corn::-50 ✅
It just means that we usually do not write so tricky, can be written as a complete, such as :: written ::1, -5 written -0.5;
There are many examples here that you can draw inspiration from.
More Tutorial
If you’re excited to dive into the world of AI image generation, you’ve come to the right place! Want to create stunning images with ComfyUI? We’ve got a detailed guide for that. Or maybe you’re curious about WebUI? Our WebUI tutorial has you covered. Each guide is designed to be simple and fun, helping you master these powerful tools at your own pace. Here, you can learn all the AI knowledge you need, stay updated with the latest AI trends, and let your creativity run wild. Ready to start? Let’s explore the exciting world of AI together!
Share this content:




1 comment