- ComfyUI Tutorial 01 – A Comprehensive Overview of AIGC
- ComfyUI Tutorial 02 – ComfyUI Local Deployment
- ComfyUI Tutorial 03 – Demonstration of Drawing a Little Girl
- ComfyUI Tutorial 04 – To install the ComfyUI Manager
- ComfyUI Tutorial 05 – Shortcut key list
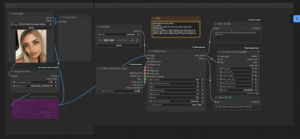
Hands-On ComfyUI: Creating Your First Character IllustrationReady to bring your digital artwork to life? Let’s dive into creating a charming little girl portrait using ComfyUI’s node system. Don’t worry about theory today – we’re focusing on practical magic!
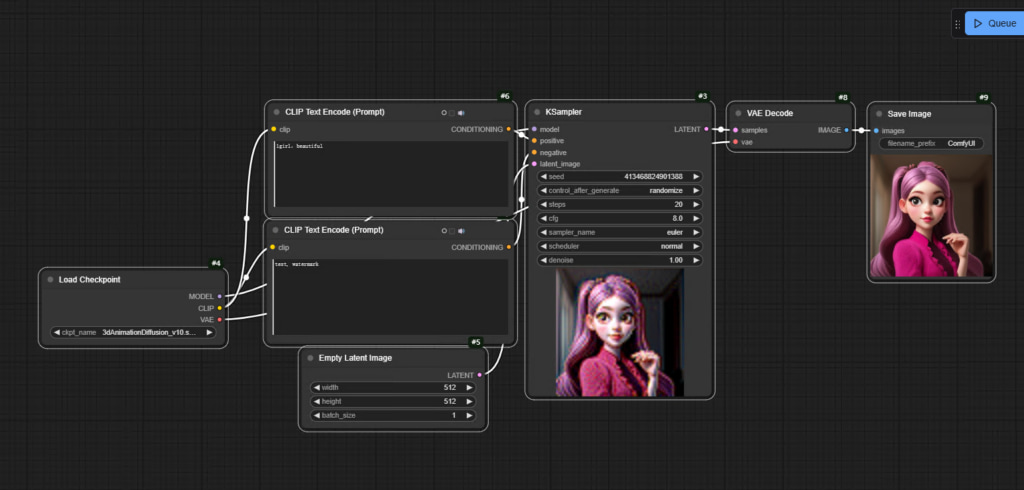
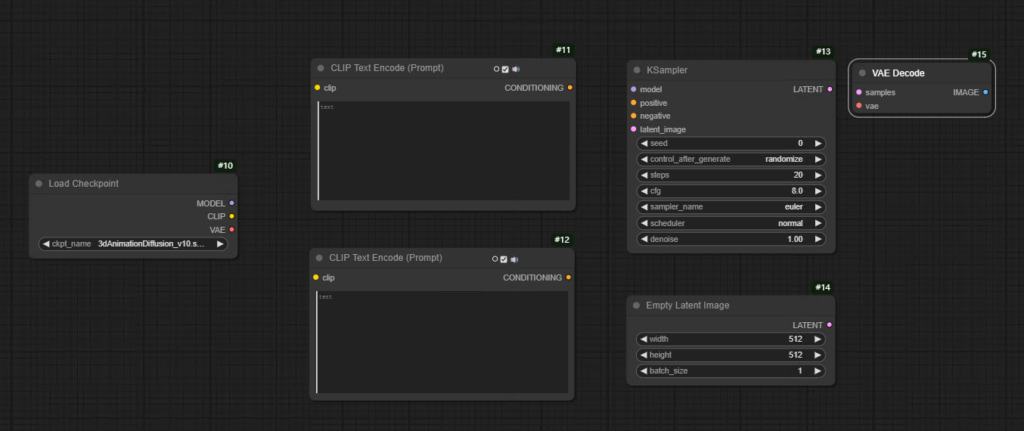
Step-by-Step Node Setup Guide – ComfyUI:
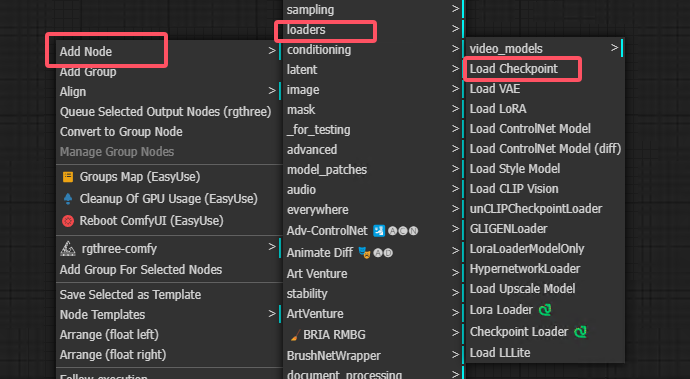
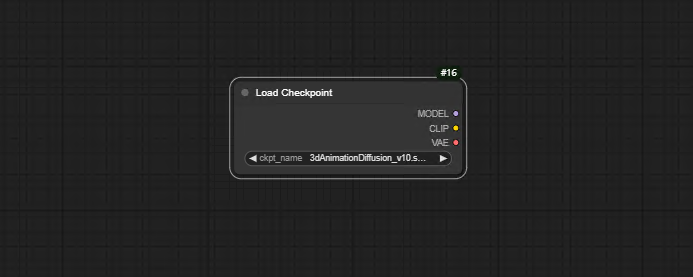
1. Foundation First:
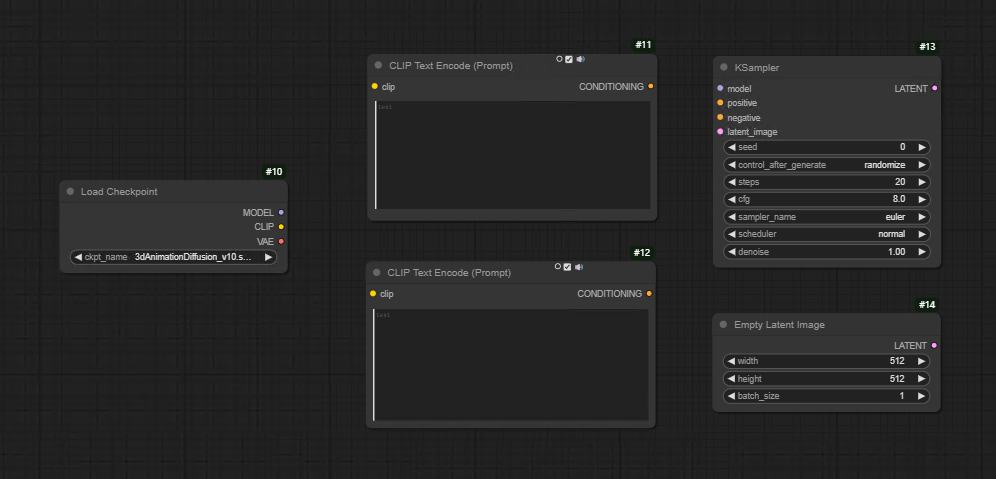
Checkpoint LoaderStart by right-clicking in the workspace and selecting “Checkpoint Loader” from the Add Node menu (look for the red highlighted options in your interface). This is your gateway to Stable Diffusion’s power – it loads the AI model that’ll handle the actual image generation.
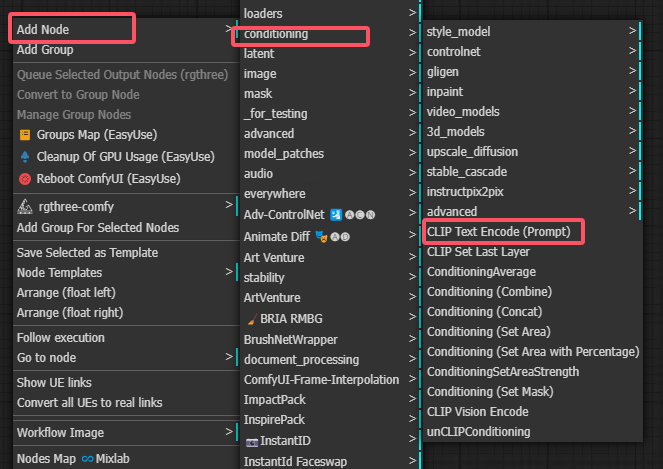
2.Prompt Engineering Duo:
CLIP Text EncodersCreate two of these sidekicks:
Positive Prompts: Describe exactly what you want (“sunlit meadow, smiling girl with braids”)Negative Prompts: Specify what to avoid (“blurry hands, extra fingers”)Pro Tip: Connect both to your Checkpoint Loader for maximum effect!

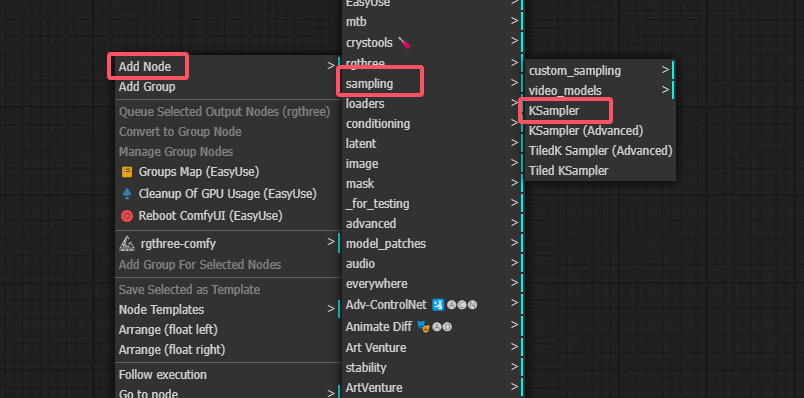
3. The Magic Maker: KSampler
This workhorse node transforms your ideas into pixels. Link it to:✓ Checkpoint Loader (the brain)✓ Text Encoders (the instructions)✓ Empty Latent (your digital canvas)
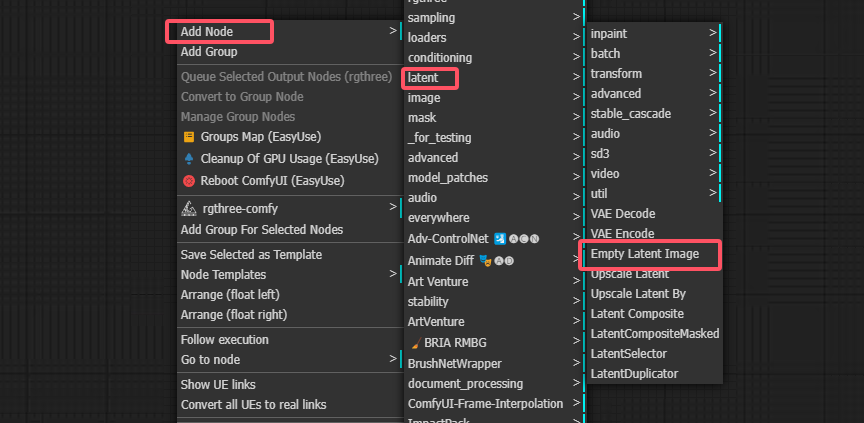
4. Digital Canvas:
Empty Latent NodeSet your artwork’s dimensions here – think of it as choosing your paper size. Connect this to KSampler to define resolution and initialization parameters.
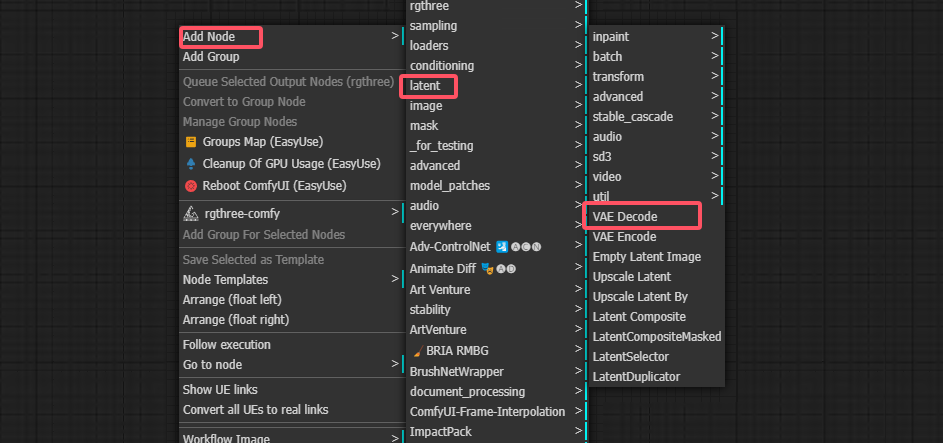
5.Reveal the Art:
VAE DecoderAttach this to KSampler’s output to convert technical data into visible pixels. Watch your latent space creation materialize into a real image!
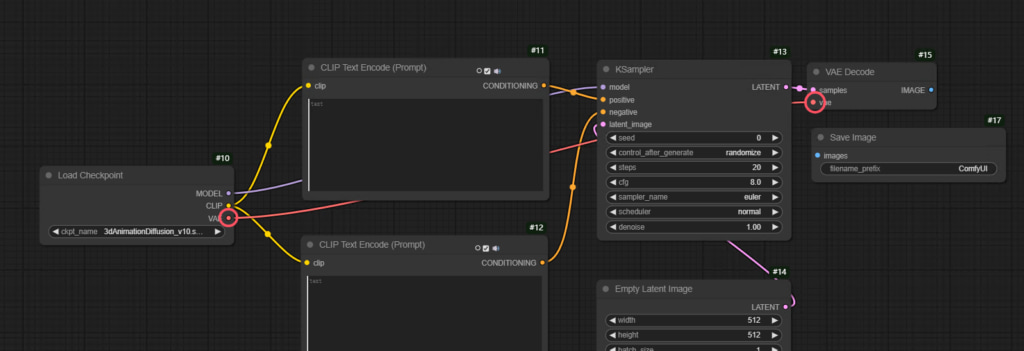
6. Save Your Masterpiece
- Drag in the Save Image node to:
- ✓ Choose PNG/JPEG format
- ✓ Name your file
- ✓ Select storage locationNever lose your creations – this final step is crucial!
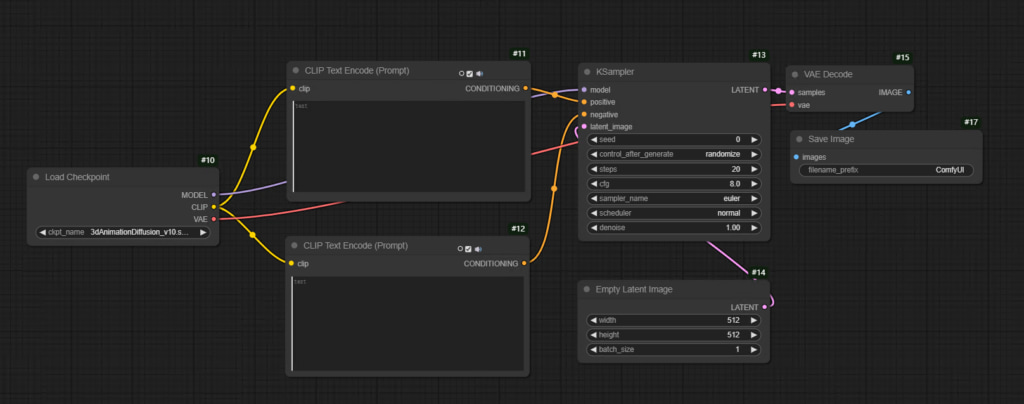
Step-by-Step Node Connection Guide – ComfyUI
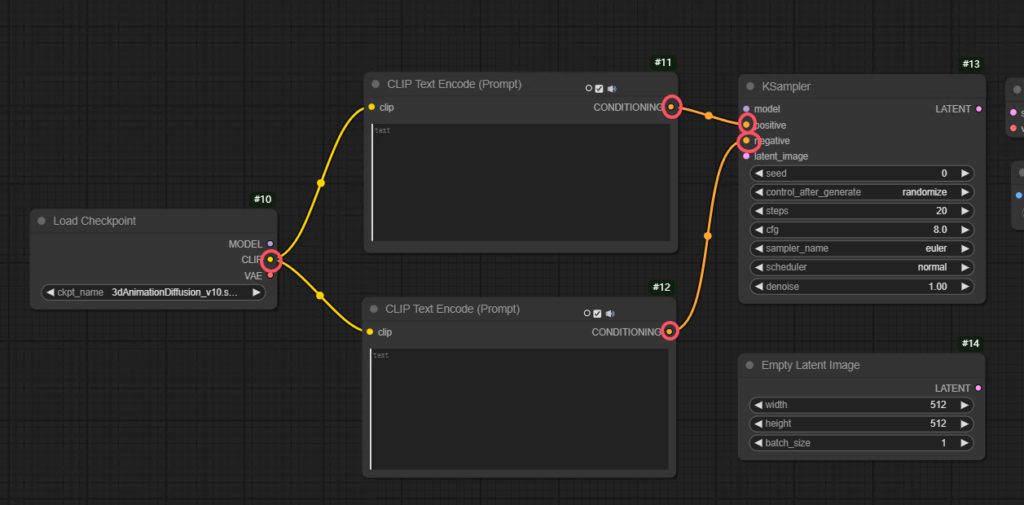
1.CLIP Text Encoder Setup
Linking Prompts Made Simple
To connect your text prompts:
Positive prompt:
- Start by left-clicking the output port (small circle) on your “Condition” node
- Drag this connection to the first CLIP Text Encoder’s input
- Type descriptors like “1girl” and “beautiful” to shape your ideal image
Negative prompt:
- Connect another “Condition” output to the second CLIP Text Encoder
- Protip: While we’re leaving this empty now, you might later add exclusions like “no blurry details” or “avoid cartoonish styles” here
2.Model Configuration
- Connect your chosen model’s output to the KSampler node
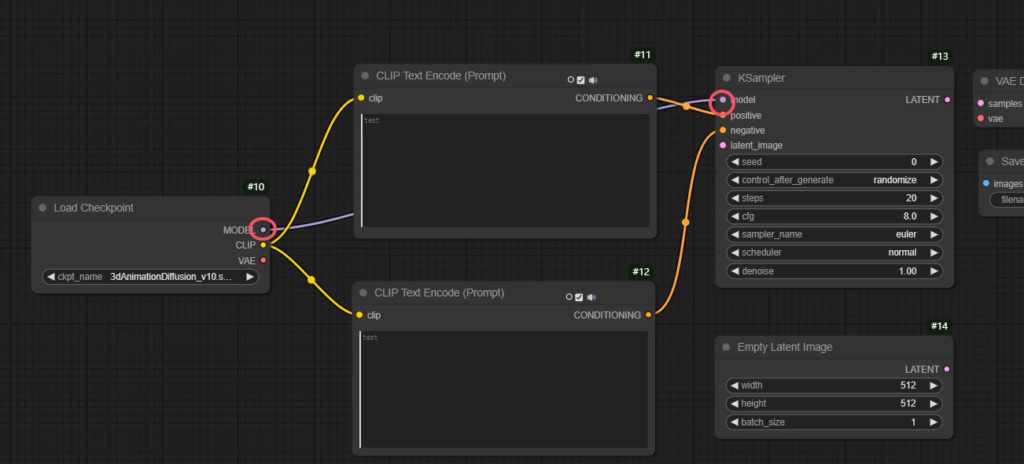
- Attach the VAE decoder to the final output stage
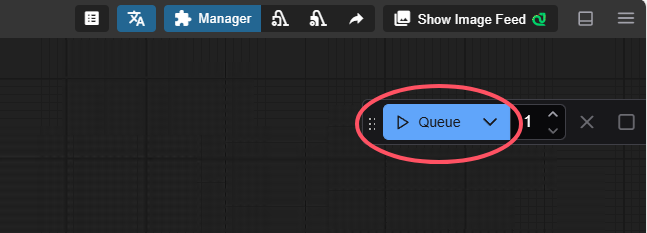
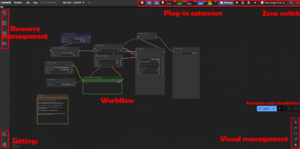
5.Workflow Monitoring
- Click the “Queue” panel (right-side menu)
- Watch real-time updates:
- Progress percentage
- Estimated time remaining
- First-generation patience pays off – subsequent runs will be faster!

Key Parameters Explained
- Checkpoint Selection: Choose your base model in the Loader node like picking film stock for photography
- Prompt Crafting:
- Positive prompts are your creative direction
- Negative prompts act like quality control filters
Why This Works
The dual CLIP encoders create a “carrot and stick” approach – encouraging desired elements while subtly discouraging unwanted artifacts. Even with empty negative prompts, the system’s default quality filters remain active.
More
If you want to dive into the breathtaking world of AI image generation? You’ve landed in the perfect spot! Whether you’re looking to create stunning visuals with Midjourney,or unlock the magic of WebUI, we’ve got you covered with comprehensive tutorials that will unlock your creative potential.
Feeling inspired yet? Ready to push the boundaries of your imagination? It’s time to embrace the future, experiment, and let your creativity soar. The world of AI awaits—let’s explore it together!
Share this content:


1 comment