Welcome to the ComfyUI tutorial series! If you’re searching for a powerful and flexible user interface tool, Comfy UI is the perfect solution. This comprehensive series will guide you from beginner to expert, covering everything you need to know about designing, building, and optimizing with ComfyUI.
The new interface of ComfyUI has been out for a while. However, due to concerns about stability and plugin compatibility, I hadn’t upgraded until recently. Seeing more and more platforms switching to the new interface, I decided to give it a try. After using it for some time, I found it quite user-friendly. In this article, I’ll share how to use the new interface of ComfyUI.
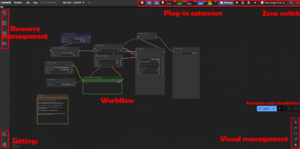
ComfyUI Overall Page Layout
The new ComfyUI interface is intuitive and user-friendly, designed to streamline the creation and management of workflows. The layout is primarily divided into the following sections:
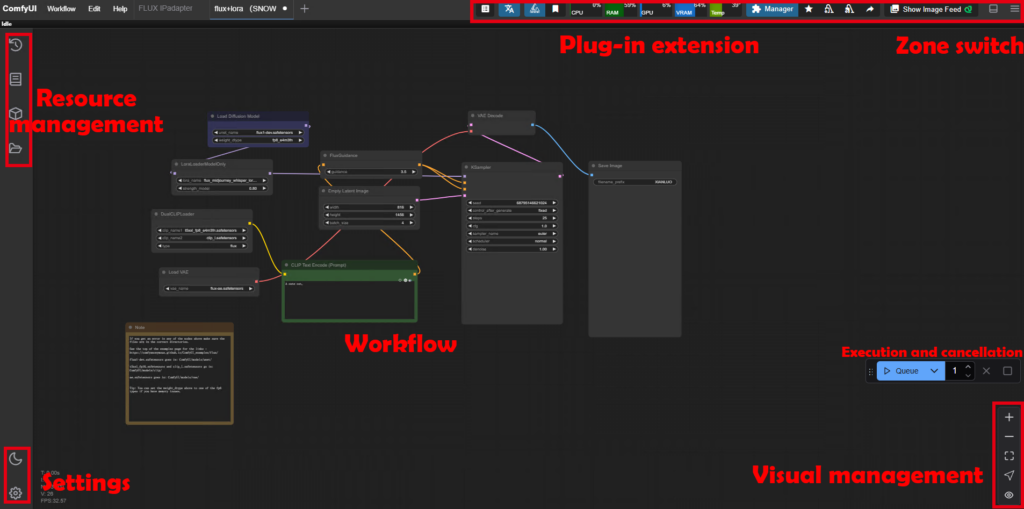
- Basic Workflow Operations
Includes common operations such as managing workflow files, editing, and accessing help. - Workflow Visual Controls
Allows adjustments to workflow size, controls for connections between nodes, and more. - Workflow Workspace
The area where you design your workflow by adding, deleting, and configuring nodes. - Resource Management
Manages task queues, node libraries, model libraries, workflows, and nodes in the current workflow. - Settings
Offers theme toggles, as well as various settings for ComfyUI and its plugins. - Area Toggle
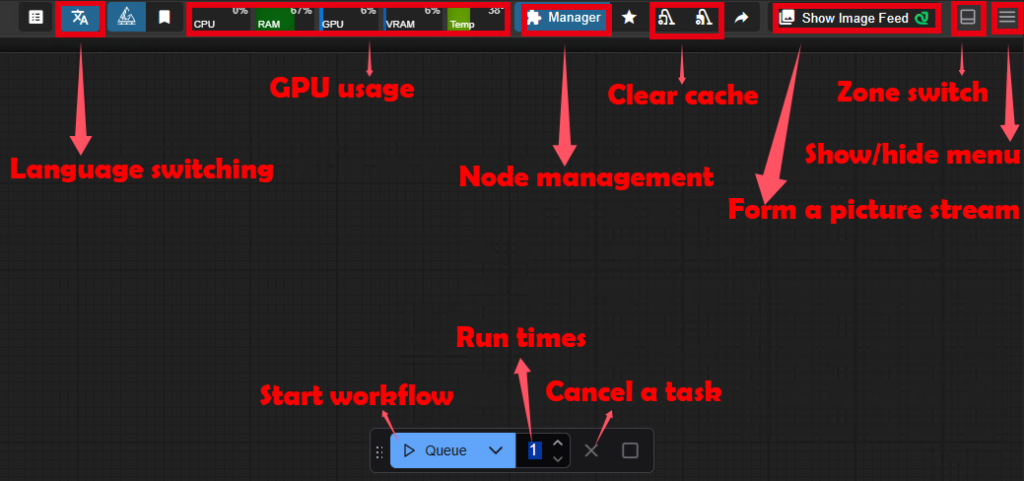
The top-right corner provides buttons to hide/show different interface areas. - Execution and Queue
Start or cancel workflows, and set the number of execution cycles for workflows. - Plugin Extensions
Includes features provided by plugins, such as language switching, GPU usage display, and plugin management.
ComfyUI Basic Operations
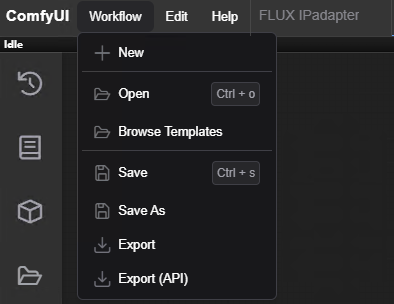
New Workflow
Create a new blank workflow from the workflow menu in the top-left corner.
Open
Load a workflow or an image containing a workflow from your local computer.
Save and Save As
Save the current workflow to a folder under ComfyUI. Use “Save As” to rename and save it.
Export
Export the workflow and download it to your local device via the browser.
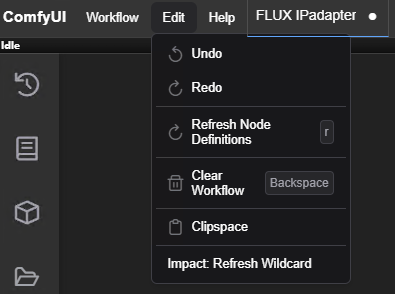
Undo and Redo
Accessed via the edit menu, these features allow you to undo or redo recent workflow modifications, making it easy to correct or revert changes.
Refresh Node Definitions
When external resources are updated (e.g., new models are downloaded or new images are added to the input directory), refreshing ensures the nodes load the latest resources.
Clear Workflow
Clears all nodes from the current workspace, returning it to a blank state for a fresh start.
Clipboard Space
Displays content from the clipboard in the workspace, such as copied images, for further operations.

Blow up/Minification/Self-adaptation
Adjust the workflow view by zooming in or out for a better look at the workflow structure or node details. Alternatively, use the mouse scroll wheel for convenience.
Drag/Select Mode
Controls how the mouse interacts with the workflow:
- Select Mode: Allows you to select and drag individual nodes.
- Drag Mode: Enables dragging the entire workflow with the mouse.
Close/Show Connections
If the connections between nodes are distracting or unnecessary for others to see, this feature allows you to hide them easily.
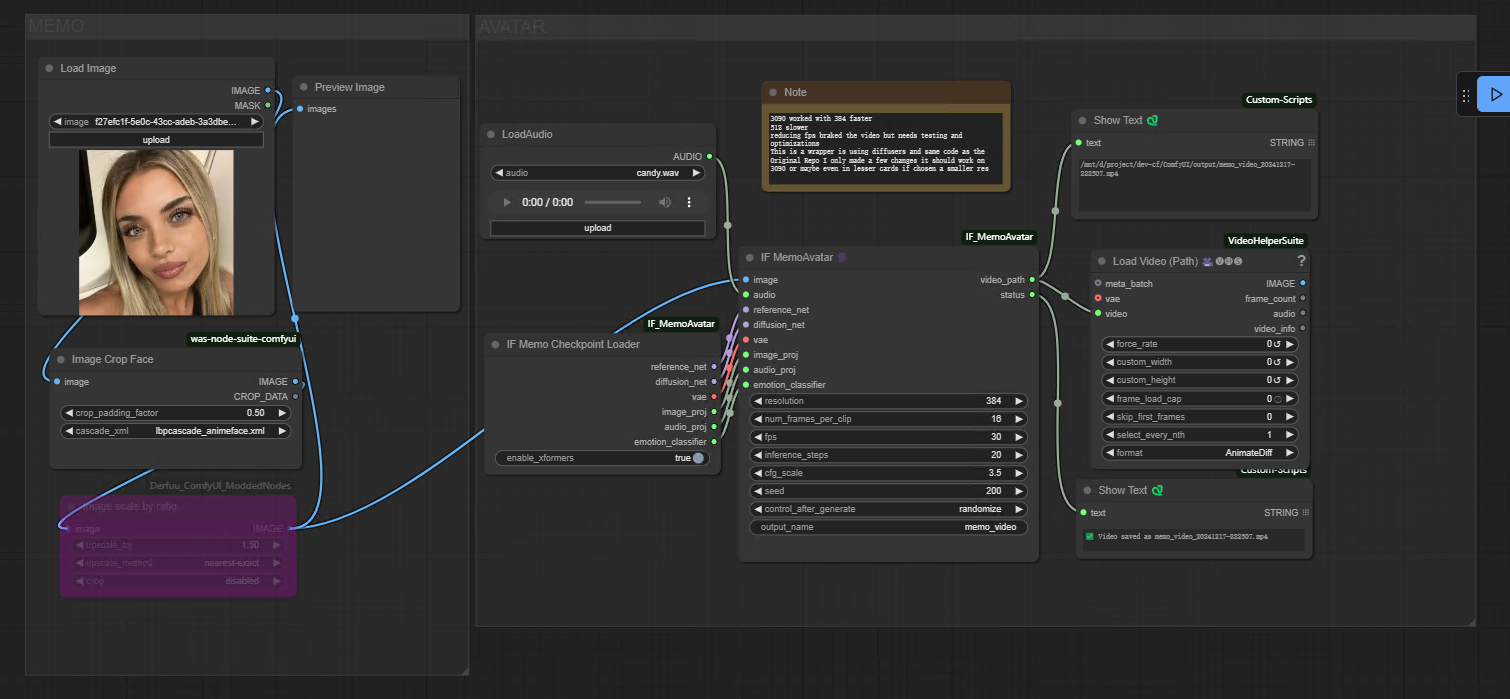
Core Operation Area of ComfyUI
Add node
1.Double-click the left mouse button, and search for the node in the node search box that is displayed.

2.Right-click on a blank space in the workspace and select the node you want in the “New Node”.

ComfyUI Resource Management
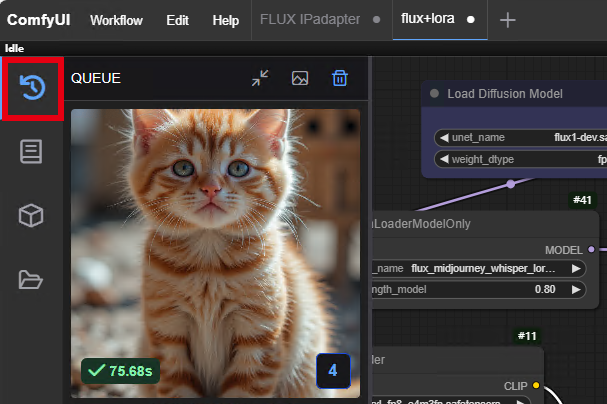
Task Queue
The task queue on the left displays all pending, ongoing, and completed tasks. This allows users to batch-submit tasks and monitor their execution status.
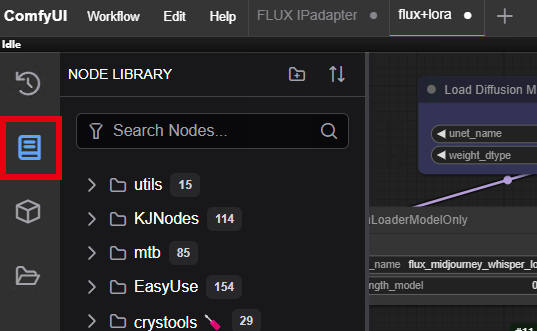
ComfyUI Nodes
The node library contains all supported node types in ComfyUI. Users can quickly deploy the required nodes in the workspace by double-clicking or dragging them from the library.
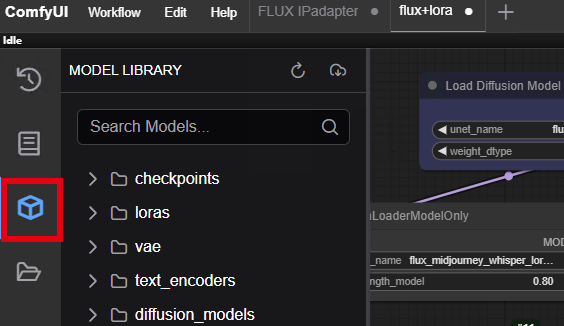
Models
The model library manages all available AI models, making them easy to load and use. By double-clicking or dragging, users can quickly load standard models, which will appear in the interface for further operations.
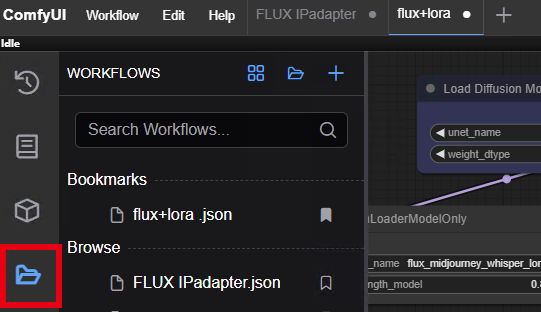
Workflows
This section displays all saved workflows. Users can double-click a saved workflow to quickly open and resume previous work, enhancing workflow continuity and efficiency.

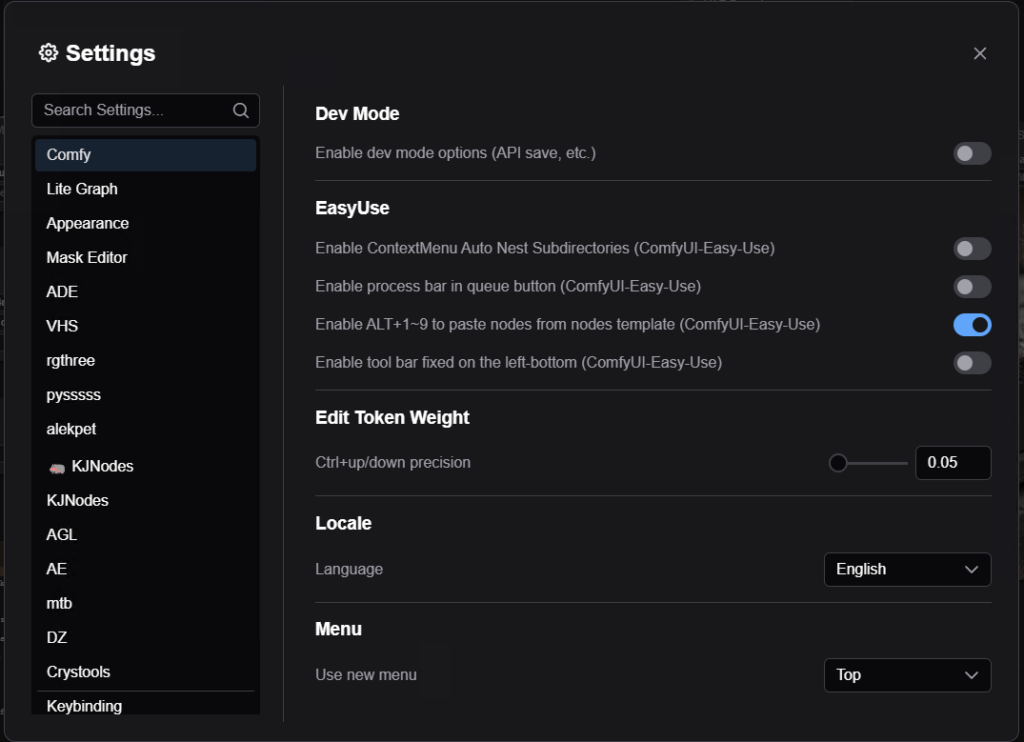
Settings
- Theme Toggle
Switch between light and dark themes to match personal preferences or the working environment. - Settings
Includes basic ComfyUI settings and additional options provided by installed plugins, catering to personalized needs.
Plugin Extensions
Beyond the core features, installing plugins can unlock additional capabilities, such as:
- Plugin management
- GPU resource monitoring
- Cache cleaning
- Bookmark management
These tools greatly enhance user convenience and daily operations.
More Tutorial
If you’re excited to dive into the world of AI image generation, you’ve come to the right place! Want to create stunning images with ComfyUI? We’ve got a detailed guide for that too. Or maybe you’re curious about WebUI? Our WebUI tutorial has you covered. Each guide is designed to be simple and fun, helping you master these powerful tools at your own pace. Here, you can learn all the AI knowledge you need, stay updated with the latest AI
Share this content:


Post Comment